| Rating | Where to buy |
 | Amazon.com *Same or similar item |
Jovision IP Camera JVS-H510 sports a 1-megapixel HD camera with PTZ (Point-tilt-zoom) ability that comes with a built-in micro SD card slot that supports up to 64GB of memory. It features 3.6 millimeter CMOS sensor and Infrared lights for video streaming and/or recording in the dark. The camera can be connected by 6 clients simultaneously.
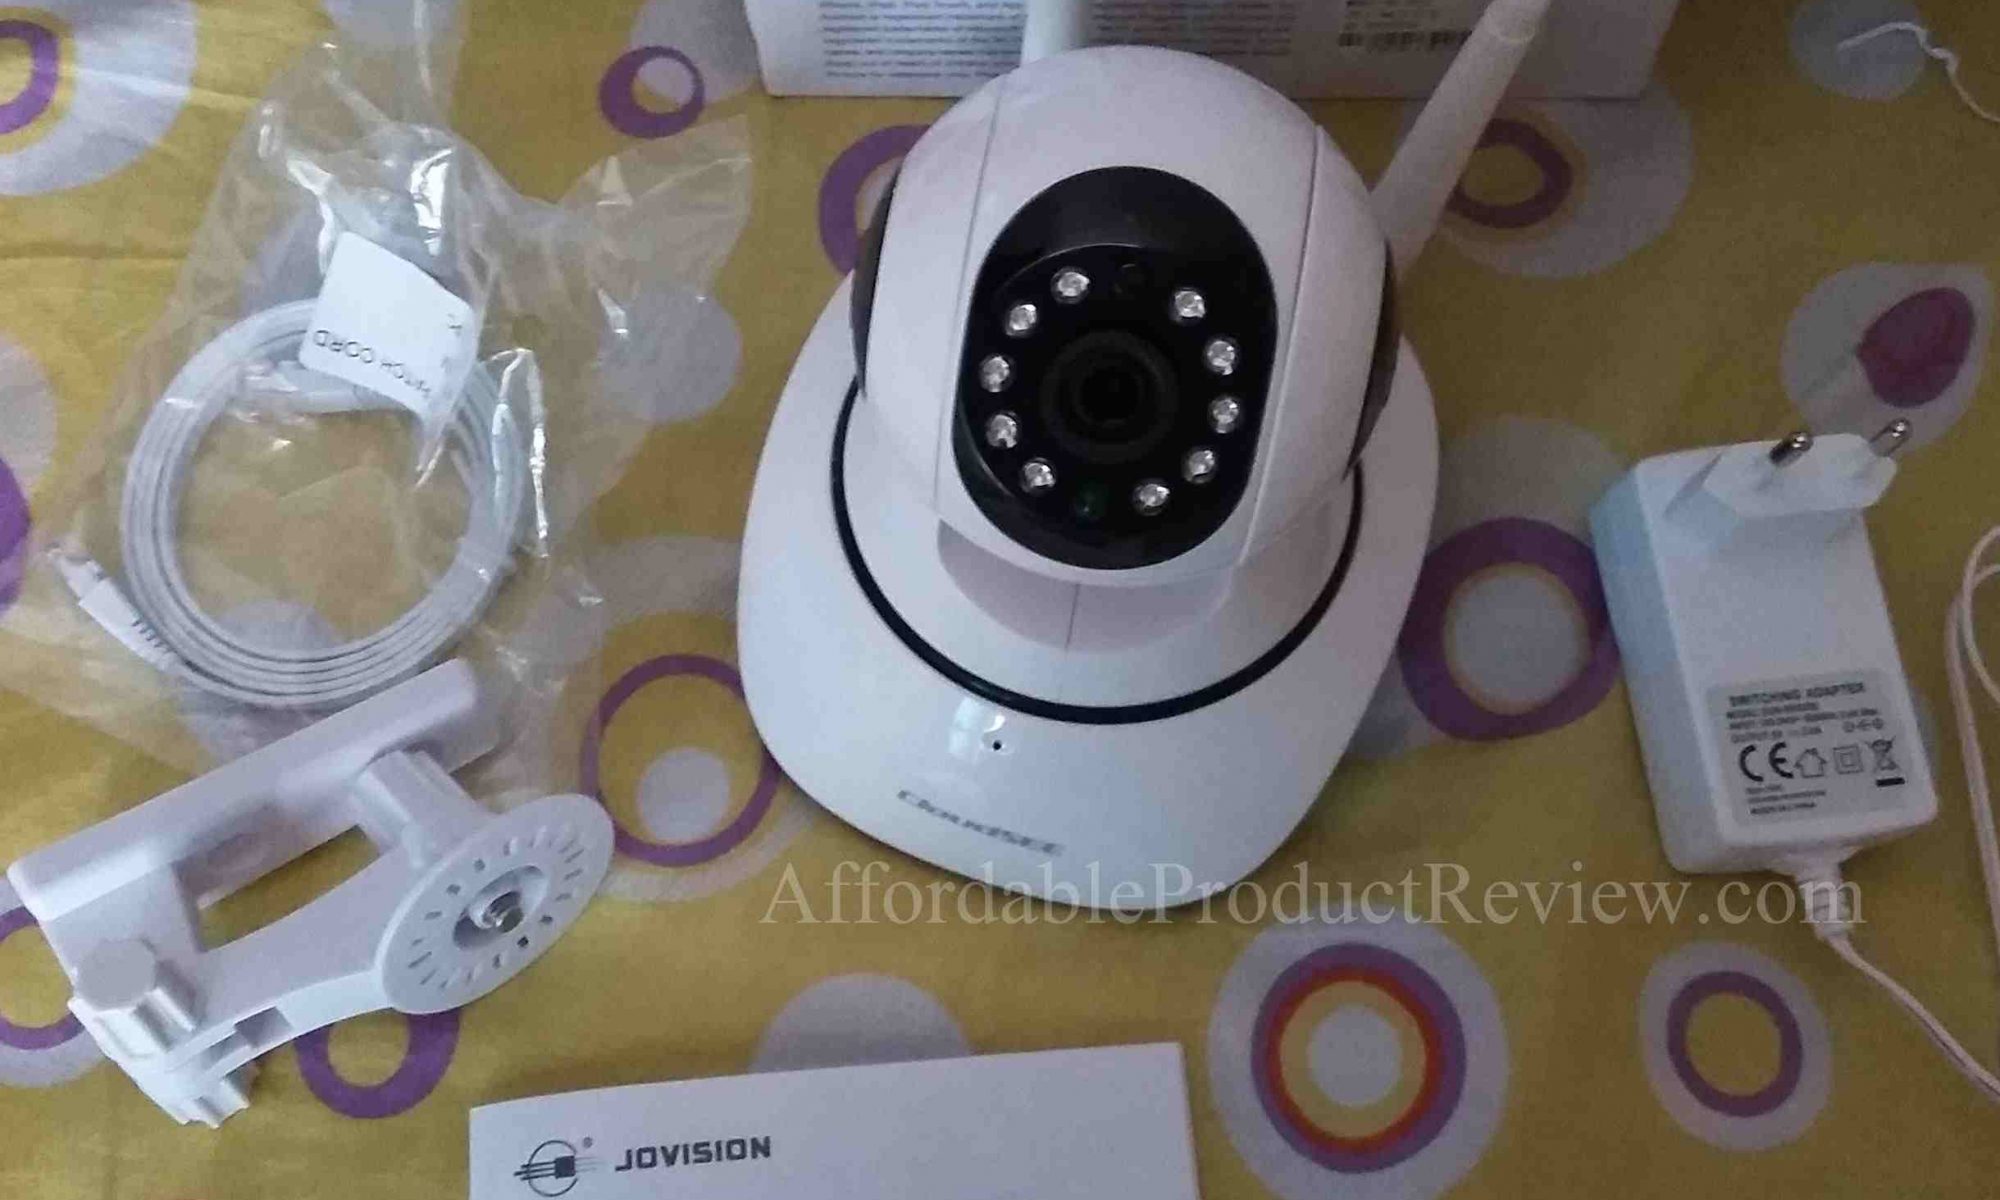
Un-boxing
It comes in protective boxing. The box contains Jovision JVS-H510 IP camera, power adapter, Quick Start Guide, Ethernet cable, wall mount, and two screws and plastic anchors.
Design
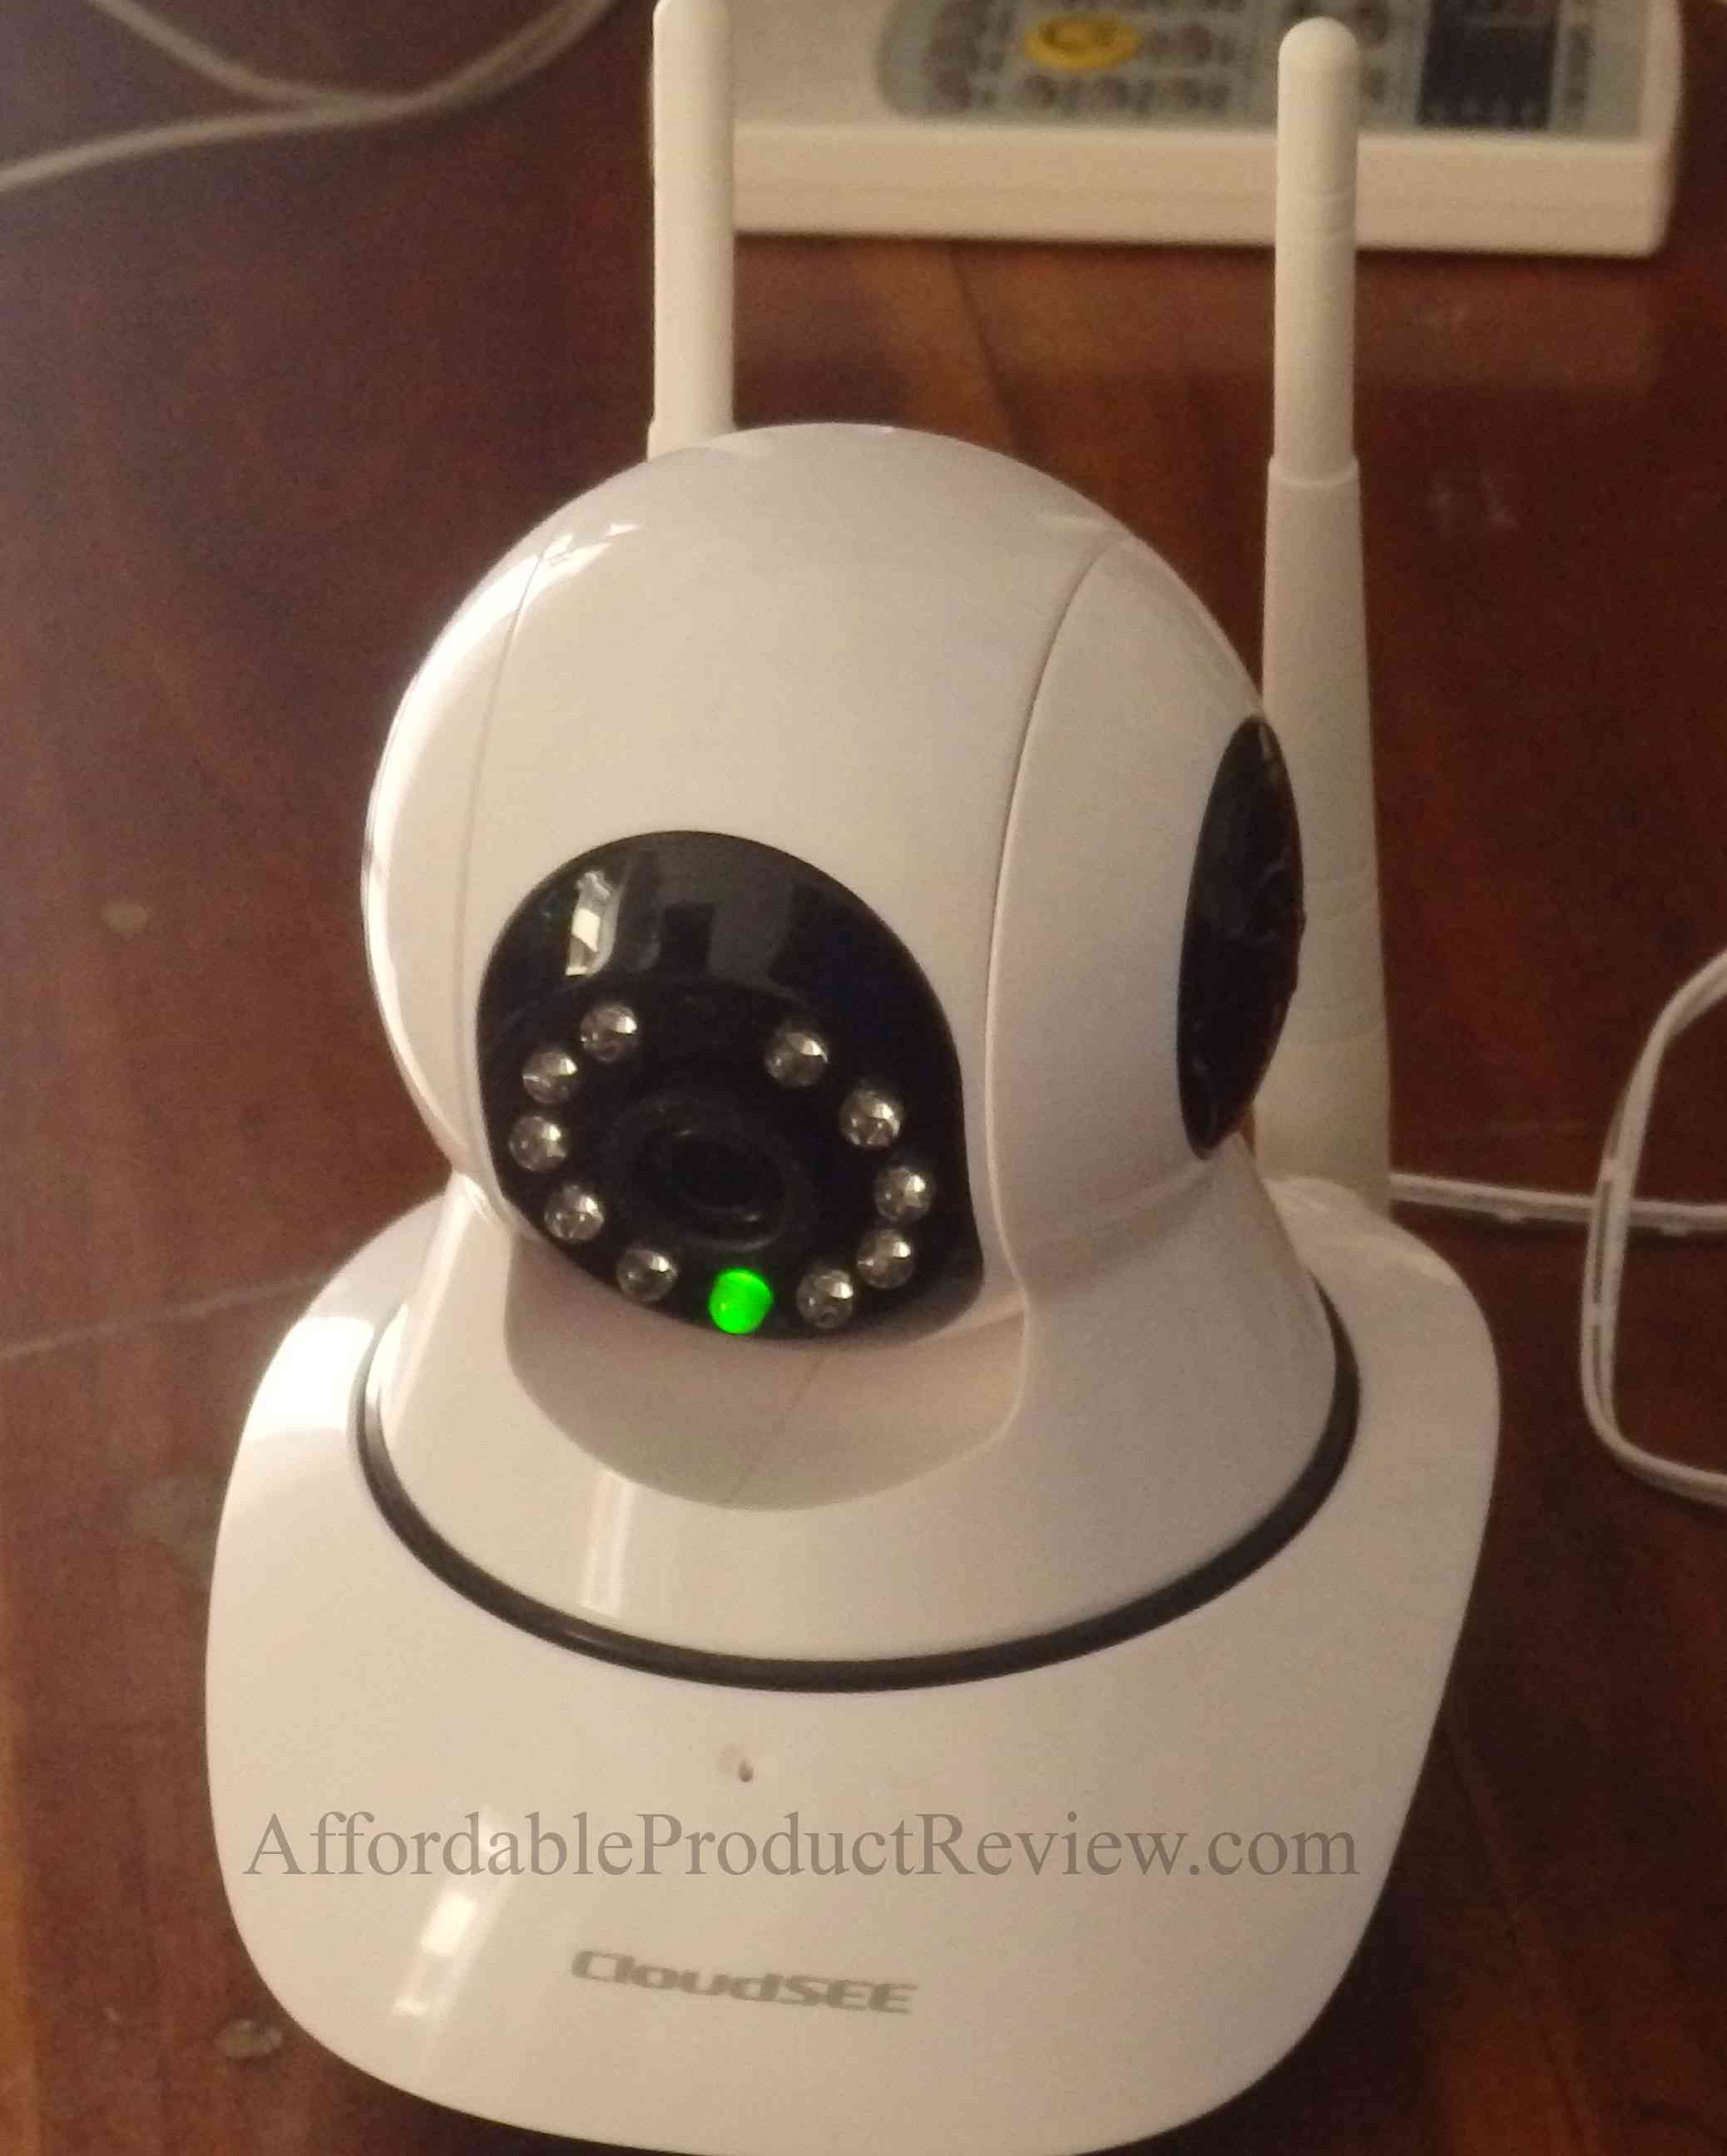 Jovision IP Camera JVS-H510 looks like a cute toy robot. It is adequately heavy, well built, and has two antennas for Wi-Fi reception. It features 10 infrared lights for streaming and recording at night and power LED light. With a dimension of about 6 inches in height, 4 inches in width, and 5 inches in depth, Jovision JVS-H510 IP Camera is easy to move and place at any corner of a room where you have a power outlet to connect it to. The power cable is only 1 meter in length, so you will need to place it close to a power outlet, or use a power strip to place it at a suitable location.
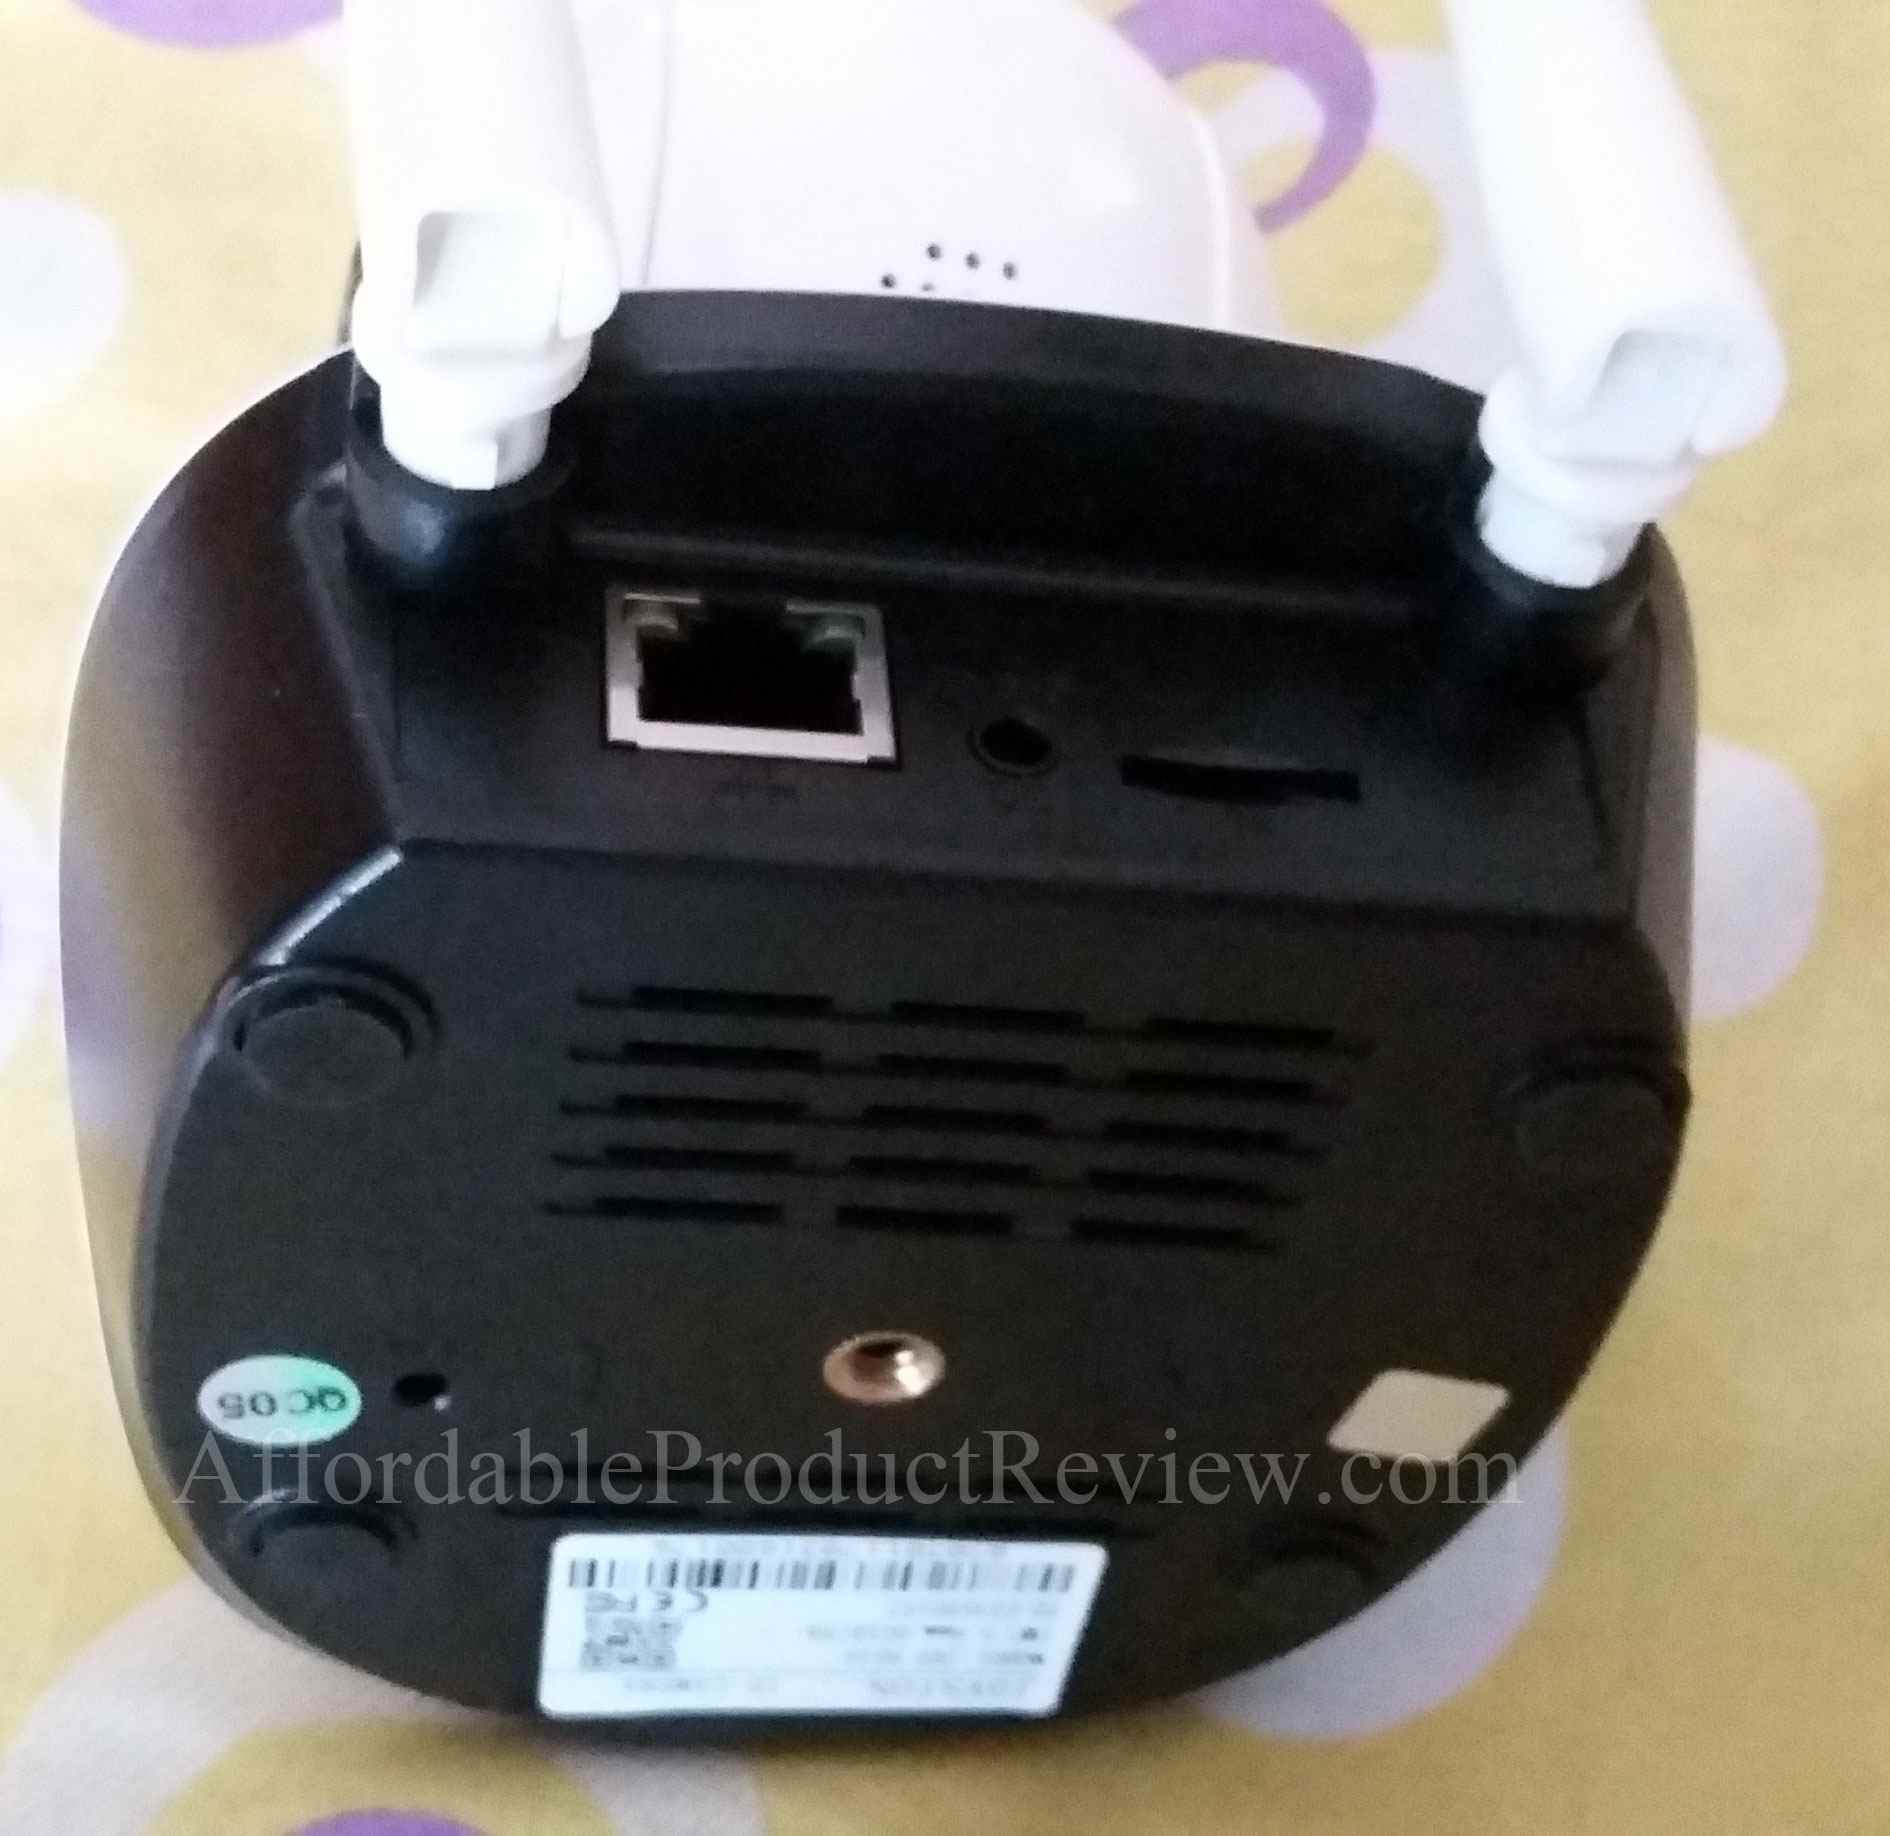
The micro SD card slot, LAN port, and A/C-in port are conveniently located on the back of the IP camera. The microphone hole is located on the front. You can talk to someone on the camera end even if you are miles away from there. The reset button is located on the bottom surface; the docking for wall mounting is located by the reset button.
Overall, it has a neat design with a cute look. However, given its size, shape, and weight, it feels more suitable for putting on a desk or similar surfaces rather than mounting on the wall.
Features
Jovision IP Camera JVS-H510 features a 1-megapixel 3.6 millimeter CMOS sensor. It features 10 infrared lights for streaming and recording in a completely dark surrounding. Supported IR distance is 8 to 10 meters. It also features a built-in motion sensor. The maximum resolution supported by this IP camera is 1280×720 pixels. It features Wi-Fi 802.11b/g/n and supports up to 64 GB micro SD card for recording videos.
JVS-H510 comes with a free App named CloudSee Int’l for your Apple or Android devices. It has CloudSee client for your desktop or laptop computer too. JVS-H510 can be connected by 6 clients at a time.
About the CloudSee Int’l App
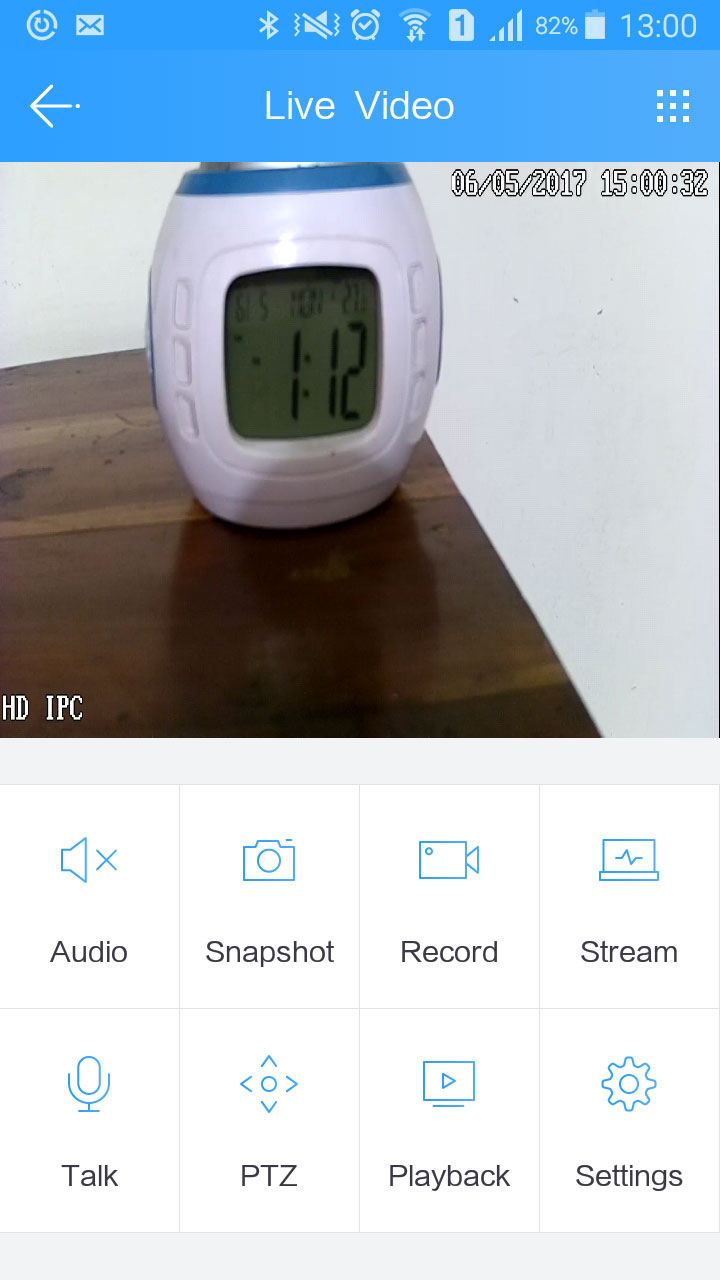 CloudSee Int’l App is simple to get used to. It has an Audio button that you can enable if you want to hear what’s going on at the camera end. The Snapshot function lets you take still pictures, Record function lets you record video.
Stream function is for selecting streaming quality from three different quality options namely HD, SD, and LD. The Talk button is for talking to someone at the camera end. The PTZ (Point-tilt-zoom) function is for rotating the camera to adjust the viewing angle from within the app. Playback function is for playing the recorded videos. And Settings is for setting alarm, time, system configuration among other functions. Since the camera is capable of detecting motion, so you can set it to an Alarm mode in case motion is detected on the camera end.
The alarm function can be used for recording videos or pictures only when motion is detected. Overall, the App features all the functions that a general user might need or wish to have. However, the alarm function needs some improvement, which is discussed in the Quality section.
Setup
JVS-H510 Jovision IP Camera setup was simple. It took less than 4 minutes for us to set it up and get started. We downloaded the CloudSee Int’l app from the Play Store (Android). You can sign in to the app as a guest using the default username and password which are abc and 123 respectively or sign up for better performance and access to all available camera features and functions.
We signed up and signed in with CloudSee Int’l App. After signing in, we powered on the camera. JVS-H510 took about one minute to initialize. It began rotating left and right, and up and down.
Once it finished initializing, the app gave us two options to add the camera to its Device List. The recommended option was to use the SoundWave configuration. Tapping the ‘Add by Soundwave’ button on the App holding the reset button for 5 seconds will initiate the setup process. A nice female voice saying “Waiting for configuration” is heard at which point. We tapped next. The IP camera asked for Wi-Fi connection credentials.
We entered the credentials, tapped next, set our phone’s volume to maximum and took it close to the microphone of Jovision IP Camera. Finally, we tapped the Send button to send the sound wave to the camera. We waited for a while till the “Successful configuration” voice confirmation could be heard. The device had joined the network. Once again, we tapped next, and the App started scanning for camera connected to the network. AS the scan was complete, the IP camera showed up on the screen. We added it and voila – the camera began streaming video on our phone screen.
Overall, the setup was simple and easy. If you are new to IP cameras, the Quick Start Guide will come handy.
Quality and Performance
 The camera was able to stream pretty good video quality during daylight as well as in complete darkness. When there’s light, it streamed and recorded colored video, while in low light and complete darkness it streamed grayscale video. In both cases, the video was clear, not fuzzy.
The motion detection alarm worked fine, except the fact that the alarm noise is only made by the Jovision IP camera and not by the mobile device unless the Audio function is enabled on the app. If it is enabled, the alarm noise made by the camera is simply transferred to the mobile device. It may not always be suitable to keep the audio function enabled. After all, you may not want to hear all the noises on the camera end. Also, the alarm volume is not that loud to be heard from a distance over 15 meters from the camera. Moreover, when we enabled the Talk function to talk with our colleague on the camera end, we found our voices to break up due to loud noise feeds and echo. Frankly, Talk function of JVS-H510 camera was not up to the mark.
The buttons on the App occasionally stopped working. We were able to fix it by closing and reopening the App or by restarting the camera from the app. Video streaming lagged from time to time. It could be due to poor Wi-Fi connection speed or due to the propagation delay at the CloudSee Server. The good thing is that the app never crashed. Wi-Fi reception of the camera was decent.
| Pros | Cons |
| Good video quality. The camera can be rotated using the App. The App doesn’t crash or hang. The motion sensor works properly. | Streaming lags at times. Enabling the Talk function often result in loud noise feeds from the camera. Occasionally, the camera needs to be reset from the app to make all functions work properly. |
Conclusion
Overall, we were satisfied with the quality and performance of the Jovision IP camera JVS-H510. It doesn’t hang or stop working; some buttons on the app stop working occasionally, which could be fixed by resetting the camera on the App. Given its size, shape, and weight, it is more suitable for placing on a desk or similar other surfaces rather than mounting on the wall. It is perfect for monitoring kids. You may also use it for surveillance purposes at home, office, or at other places inside your establishment but not under the open sky. The price seemed a bit steep to us given the other IP camera choices available on the market. However, in this price range, JVS-H510 is the best IP camera you can get. AffordableProductReview.com gives it a 4.0-Star rating.